
Part of the fun of gobo projections is that you can display an image on almost any surface. While a flat surface ensures the crispest image, clearly visible from multiple angles, you don’t always have an untextured, or even solid, surface to work with. It can also make a bold statement to project an image onto water, or other unexpected surfaces like a cliff face or a tree’s foliage. Each of these surfaces, however, is not without its challenges. To help you expand your marketing canvas, we’ve answered your most common gobo projection questions about working with nontraditional surfaces.
Common image projection challenges (and how to fix them)
For most uneven surfaces, there are a few common projection challenges you need to overcome to achieve a bold, crisp image. Below are some of the most common gobo projection questions answered by our projection specialists.
Challenge:
Why does my image appear distorted?
Often, outdoor projection surfaces are high above the onlooker’s vantage point, like a cliff-face or skyscraper. Sometimes, you can place your gobo projector perpendicular to the projection (for example in the window of an adjacent building). Often, however, you’re forced to set-up the projector at ground level, resulting in an effect called keystone distortion. So how can you avoid this image distortion?
Answer:
Your projection angle is too steep
The steeper your angle of projection, the more distorted the image becomes. If you can raise the projector closer to the level of your projection, your image will be less distorted. When your projector is positioned at an upward or downward angle relative to the projection surface, a landscape format artwork will appear less distorted than a portrait format. When you’re projecting from a sideways angle, however, the opposite is true.
If you can’t raise the projector, try increasing the distance to reduce the angle and minimize distortion. Most gobo manufacturers can also pre-distort the image on the gobo in the opposite direction to correct for the angle. We call this process keystone correction. This is challenging, however, because it requires your gobo manufacturer to know your exact setup (including the projector’s projection lens, distance from the projection surface, and elevation) to calculate the geometry.
Challenge:
Why are the details of my gobo getting lost in the final projection?
Are smaller lines and patterns blending into the rest of the image in your final projection? Or perhaps your cursive lettering is difficult to read. These are both common issues with uneven surfaces as well as large-scale projections. The uneven surface easily distorts delicate patterns. This means it can become very difficult to make out small details, even with a strong projector.
Answer:
Simplify your design and go with glass
The best solution to this problem is to simplify your design. Stick to bold block lettering and remove any unnecessary design components like filigree. Glass gobos also help ensure a higher quality image that stays true to your original design.
Challenge:
The image is too dark
It’s sorely disappointing when your projection is too dark to see. Fortunately, there’s a simple solution for increasing brightness.
Answer:
Reduce your image size
To brighten your image, try moving the projector g closer or zoom out to achieve a smaller image. As a rule of thumb, by shrinking the projection size to half, you gain four times the brightness. Even making the image slightly smaller can significantly increase brightness.
Challenge:
Why can’t I see black or dark lettering?
If you’re projecting onto a dark surface, like a burgundy stage curtain or a black wall, darker colors won’t be visible. This is because dark surfaces don’t reflect light. The color black doesn’t let any light through at all so it won’t show even on a light surface.
Answer:
Reverse black to white on your gobo
To ensure your resulting projection is bright and visible, choose lighter colors, like white or yellow, for your gobo. You can also add a white background. In this case, you see the shadow, which to the eye appears black because of the contrast to white. If you have a logo or other design with black lettering against a light background, simply reverse the colors so your lettering is white.
How to create crisp projections on 5 common surfaces
Understanding these common challenges associated with image projection will help you effectively troubleshoot in a variety of applications. We have specific tips, however, for how to project an image onto water, windows, and 3 other common surfaces.
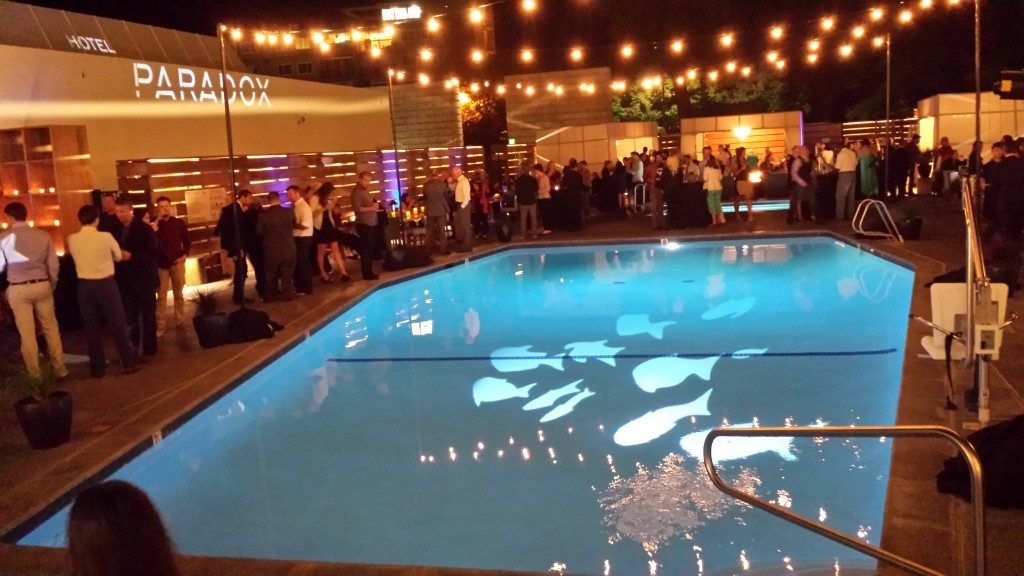
Projecting onto water
Image: projecting-an-image-onto-water-pool
There’s nothing quite as arresting as an image floating in the water like a mirage. This is a fun surface to use for your gobo projections, but also quite challenging. Swimming pools and decorative fountains are popular projection surfaces. When the water is clear and calm, however, it acts like glass, and the projected image will appear on the ground beneath the water. (See image above for an example of this effect.) If you want to achieve a floating effect you need a foamy surface. Waterfalls with a high flow rate (picture a waterfall that’s flowing so quickly and with so much pressure that the water appears white rather than clear), can act as an effective projection surface. In this case, the water takes on the property of frosted glass, allowing the image to appear on the surface.
Projecting onto a curtain
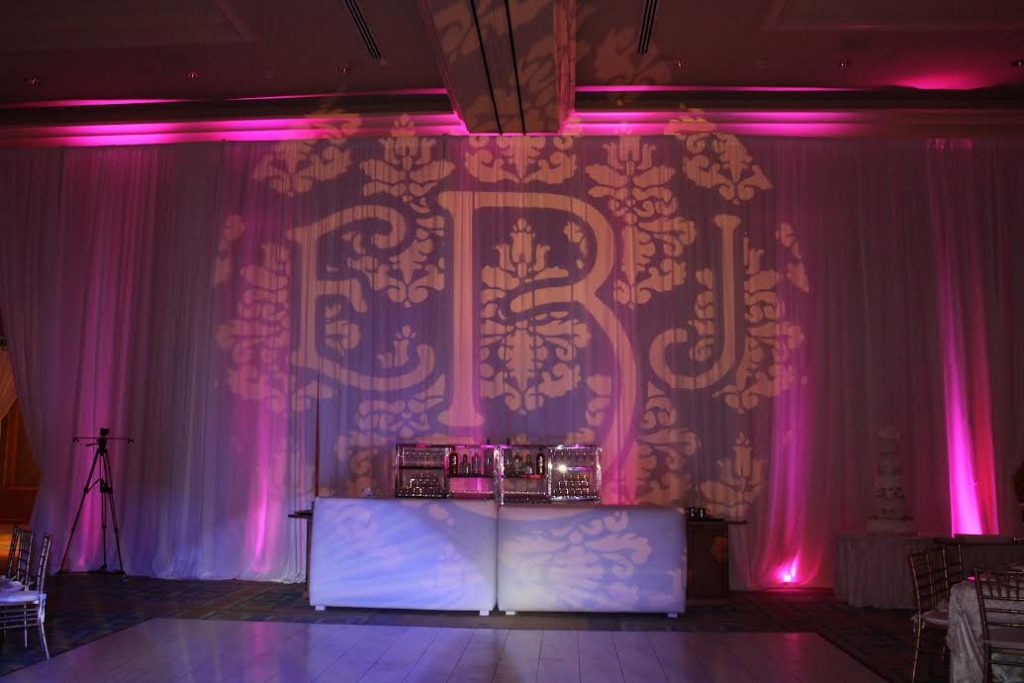
For theater productions, concerts, or speaking engagements, projecting onto the stage’s curtain helps set the ambiance for the event. Of course, the challenge with this surface are the many folds in the heavy fabric. A good rule of thumb is that the smaller the folds folds, the cleaner the image but you can still achieve a crisp projection by following a few tips.
First, the image should be simple—complex designs that include intricate patterns are hard to make out. Second, the onlooker needs to be close to the projector to clearly see the whole image. The further someone is from the curtain, the less cohesive the image becomes. Third, it’s important to project as perpendicular as possible to the folds to reduce distortion. This means you’ll need to mount your gobo projector on the opposite wall, if possible, or increase the distance between the gobo projector and the projection.
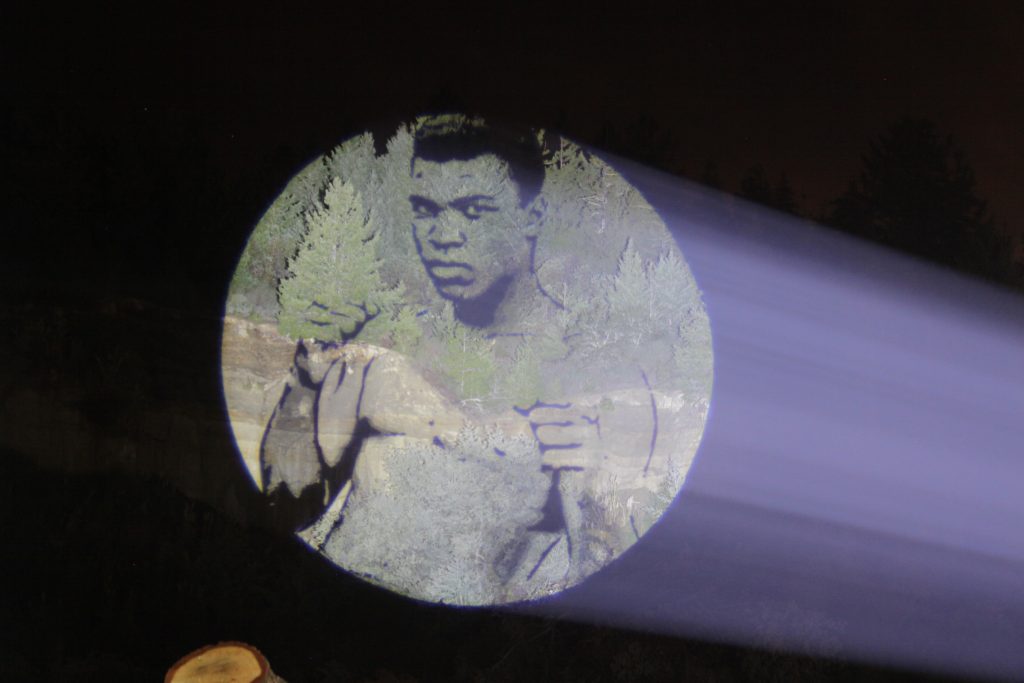
Projecting onto trees

Trees may seem like an unlikely projection surface but it is possible to use a natural canopy as your canvas. The thing to know about this uneven and patchy surface is that the image looks best when the viewer watches from the same perspective as the projector. When the viewer moves to one side or the other of the projector, the image will warp and scatter in the tangle of uneven branches. A larger projection distance will also help reduce distortion. Lastly, with such a fragmented surface, the projection will only clearly be visible at night when the dark sky helps create more contrast between the image and the foliage.
Projecting onto a cliff face
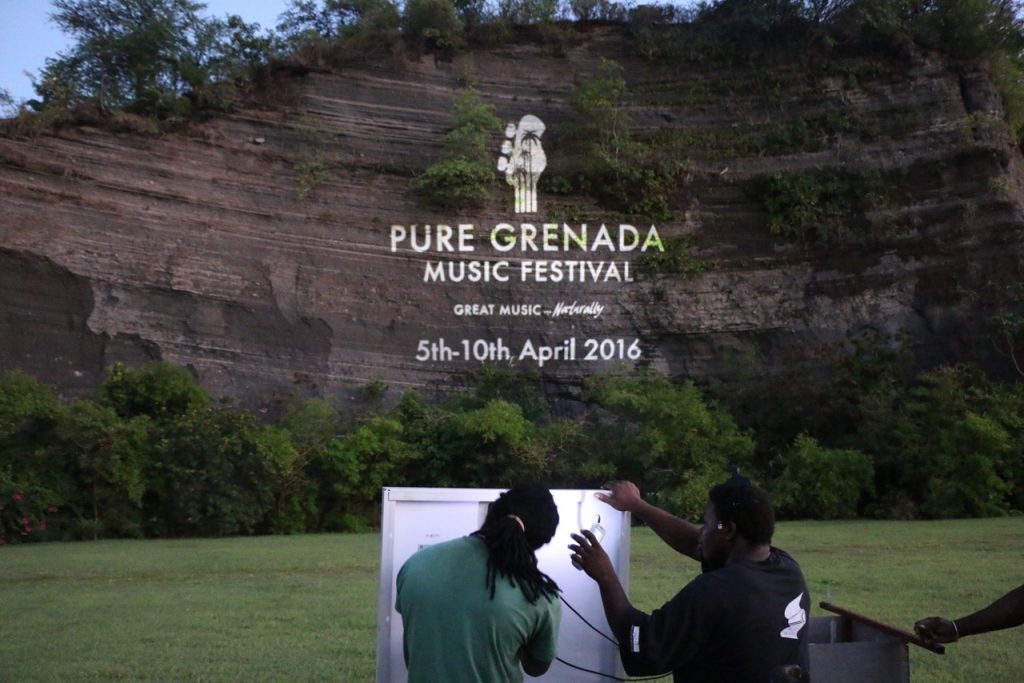
Cliff faces are a popular outdoor projection surface because they provide a large, blank surface visible from far away. While the dark, rough, angled rock poses a challenge for crisp gobo projection, it’s usually easy to achieve the desired distance between the projector and the resulting image. The ability to set up the projector below the cliff, far from the base, decreases the angle of projection, which reduces distortion. Onlookers are also viewing the projection from further away, creating a crisper image that they can view clearly from multiple vantage points.
Projecting onto windows
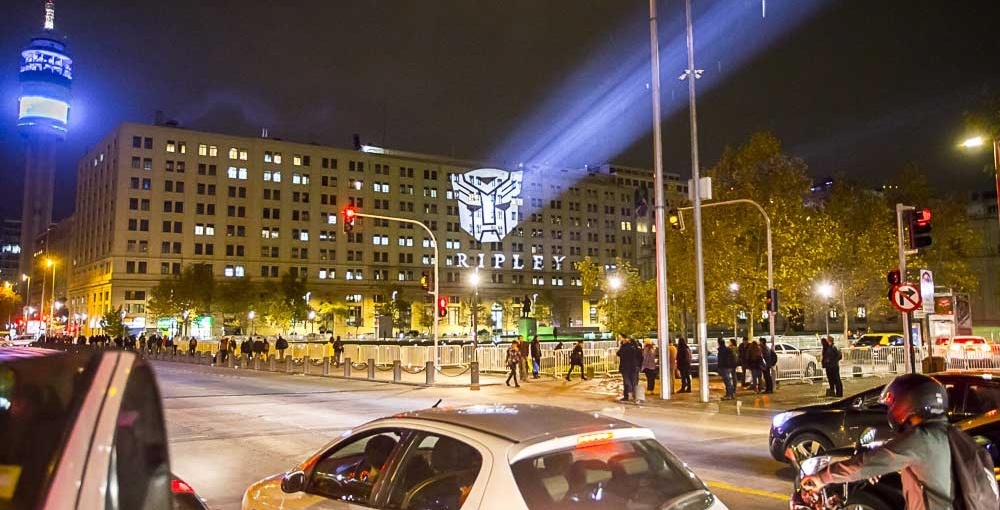
Skyscrapers can be the perfect canvas for gobo projections: They have large, relatively flat surfaces that tower above other nearby buildings. The only problem is, they’re usually covered in glass. Even if the windows are tinted, the surface does not support a projection. The projected image simply projects straight through the window into the building, unless you have the blinds drawn to create a solid non-reflective surface. If the building has many small windows, sometimes you can position the projector so that most of the image falls on the window trimming. From far away, this creates one cohesive image.
Get creative with your gobo projections
With the right setup and image, you can use many surfaces for your gobo projections. Experiment with projecting an image onto a pool at your next corporate event or use the trees to create a public art display in the park. Don’t forget, you can also design your own custom gobo for marketing at trade shows and conferences or ongoing brand awareness.
Further reading:
Large-scale Outdoor Projection 101
Tips for Using Gobos in Brightly Lit Environments
5 Color-Matching Tips for Custom Gobos
Gobo Motion Effects 101: How to Add Motion to Gobo Projections
Want to make sure you don’t miss new product releases, gobo lighting tips, and special deals? Subscribe to our Newsletter