
Large-scale outdoor projections can elevate an event or space from standard to head-turning, but only if done right. For example, building projection advertising (projecting your corporate logo high above the streets on the side of a building) can increase brand exposure, unless the logo is too faint and distorted to make out. Projecting a custom gobo onto a natural feature like a nearby hillside or cliff-face can draw attention to your big fundraiser, but only if the image is clearly visible several hundred feet away.
There are many factors to consider for this type of gobo projection, but with a few tricks up your sleeve, you can ensure your image is bright and clear. We’ve put together the main challenges and solutions to large-scale outdoor projection so that you can set up your outdoor gobo projector and project your custom gobo without a hitch.
Large-Scale Outdoor Projection: Challenges & Solutions

Photo courtesy of Plan-It Interactive.
The Challenge: Distortion on uneven surfaces
When projecting outdoors and over a large space, the entire surface is rarely flat and smooth. Buildings have windows, fire escapes, brick siding, and other architectural features that can play a role in distorting the image. The smoother the surface the better, but fortunately, there are ways to successfully project onto uneven surfaces as well.
The Solution: Keep it bold and simple
Bold images with simple text will always display better than complex patterns and lettering. Fine details get lost when projected on a textured surface, but bold graphics and text remain recognizable. To further minimize distortion, place the projector at the same angle as the onlookers’ vantage point.

The Challenge: Distorted image at steep projection angles
Many large-scale outdoor projections are high above the onlookers’ vantage point, on the uppermost stories of tall buildings or up high on a large cliff-face. If your projector is set up at ground level, far below the projected image, something called keystone distortion occurs. This basically means that the steeper the angle, the more distorted the image becomes.
The Solution: Pre-distort or decrease projection angle
Decrease Projection Angle
To prevent keystone distortion, the simplest solution is to decrease the projection angle. Sometimes you can achieve this by mounting your projector at a higher level, such as on the upper floor of an adjacent building. Of course, this isn’t always possible. If your only option is to project from below at a non-perpendicular angle, the larger the projection distance, the better. This flattens out the angle of projection, preventing keystone distortion.
Pre-distort a.k.a Keystone Correction
The other more complicated option is to pre-distort the image on the gobo in the opposite direction to correct for the angle. We call this process keystone correction. This is challenging, however, because it requires your gobo manufacturer to know your exact setup (including the projector’s distance from the projection surface and elevation) to calculate the geometry.
The best solution is often to raise the gobo projector and increase the projection distance. This will decrease the angle of projection as much as possible. It’s also important to place the projector at the same level as the viewer’s eye-level so that they have the same perspective as the projector.
Real-life Example: Taber Logo at Martins Beach
One of the most challenging projection surfaces is natural rock: it’s rough, juts out at odd angles, and the dark, coarse surface reflects very little light. Taber Construction needed their corporate logo projected onto a dark cliff face at Martins Beach in Half Moon Bay, California for a large event. In order to prevent keystone distortion and project at a flat angle, we set up the gobo projector 400 feet away on a picnic table. We used a 250mm tele lens with a glass gobo in full color to achieve a bright, clear image approximately 70 feet across.


The Challenge: Decreased brightness with increased image size
Even with a smooth surface, it’s challenging to project a clear, bright image on a large-scale because whenever you double the size of the image, it reduces the brightness by 75 percent.
Solution: A strong projector
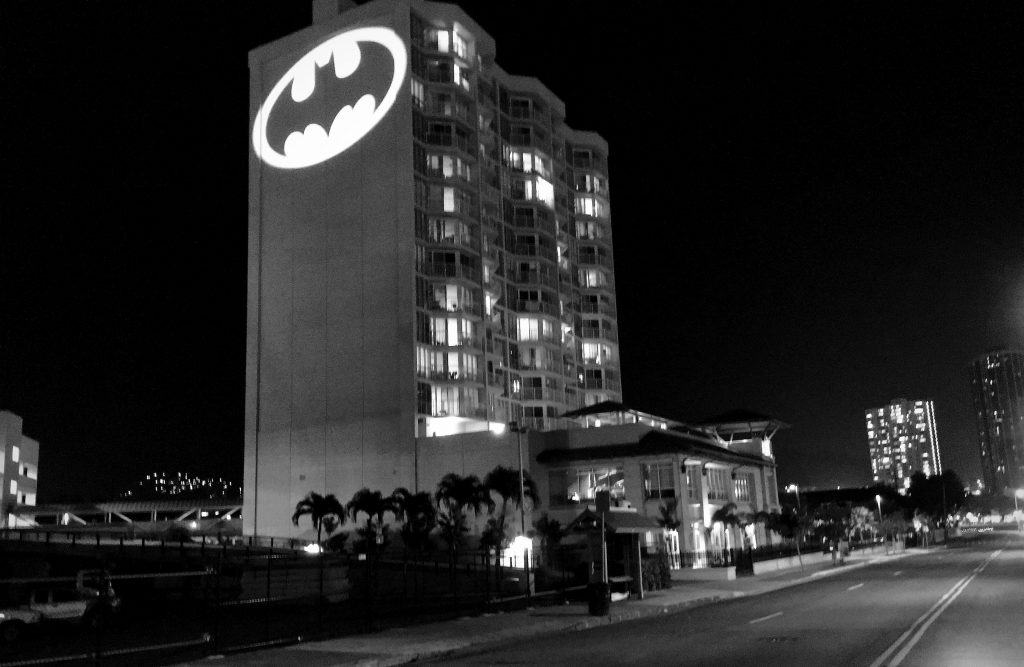
In order to clearly see an image from several hundred feet away, you need a very strong projector, such as the ECO Spot 2500. You can fit this kind of large-scale projector with a tele lens in order to increase the size of the image while only minimally sacrificing the brightness of the resulting projection. The Eco Spot 2500 can project from a distance of up to 700 feet, making it a perfect solution for a large-scale outdoor projection on the side of a multi-story building or cliff-face, as seen in the images below.


The Challenge: Faint colors and projecting black on black
Not all colors project with equal strength and brightness. This means that sometimes the colors in an image need to be flipped or slightly altered for optimal visibility and image quality. (It’s also important to keep in mind that solid colors typically perform better than gradients.)
The Solution: Reverse black artwork & use bolder shades
The color black doesn’t let any light through so it won’t project even onto a light-colored surface. You can choose a black backdrop, however, and simply reverse the black and white in your custom gobo image so that light shines through the parts of your image that you’d like to be visible. Take the below Yuri’s Night logo for example:

In order to make this 43-foot image stand out against a dark backdrop and still be visible from several hundred feet away, we had to reverse the black artwork to white because black projects as blocked light and isn’t visible.
Here is the resulting projected image:
We also had to change the gray-blue from the original logo to a bolder shade (Pantone 072C Dark Blue) to improve visibility.
The Challenge: Complex artwork
Detailed designs with filigree, arabesques (spirals and serpentine lines), and cursive lettering typically don’t translate well to large-scale outdoor projection. This is because an uneven surface easily distorts delicate patterns. Also remember that as you increase the image size, the brightness decreases by 75 percent, so it can become very difficult to make out small details, even with a strong projector.
The Solution: Keep it simple
Bold, less detailed images will always work better as a large-scale outdoor projection, especially on uneven surfaces. You can often simplify complex artwork by removing excess patterning or choosing block lettering over cursive.

Recommended Projectors & Accessories
In addition to following the above tips, it’s important to have the right gobo projector and accessories for successful large-scale outdoor projection. We recommend the following:
ECO Spot 2500
This is a very strong projector that’s best for projecting large images without sacrificing brightness.
ECO Spot LED B300E Exterior
This exterior LED gobo projector is the equivalent to our discontinued Clay Paky VIP 1200 (used to project the Taber construction logo in the example above).
ECO Spot Rain Hood Large
Although our exterior projectors are durable and can withstand some exposure to moisture, we recommend a rain hood to provide extra weather protection for permanently mounted outdoor projectors. The rain hood ensures your lens stays dry so that water droplets or smudges don’t obscure your projection.
For additional real-life examples of large-scale outdoor projection, check out our Outdoor Projection Hands-On page.
Want to make sure you don’t miss new product releases, gobo lighting tips, and special deals? Subscribe to our Newsletter